
Spritely Ginger Carrots


The seasonal feasting is over and as we slip into January I'm craving simple nourishing food. Ginger carrots are almost effortless to make, quick to ferment and easy on the palette. They are great if you are new to fermented foods or want to introduce fermented foods to your family as they are sweeter than many sauerkrauts. You can also mix them with fresh grated carrots and a squeeze of lemon and black pepper for a quick sweet, sour salad.
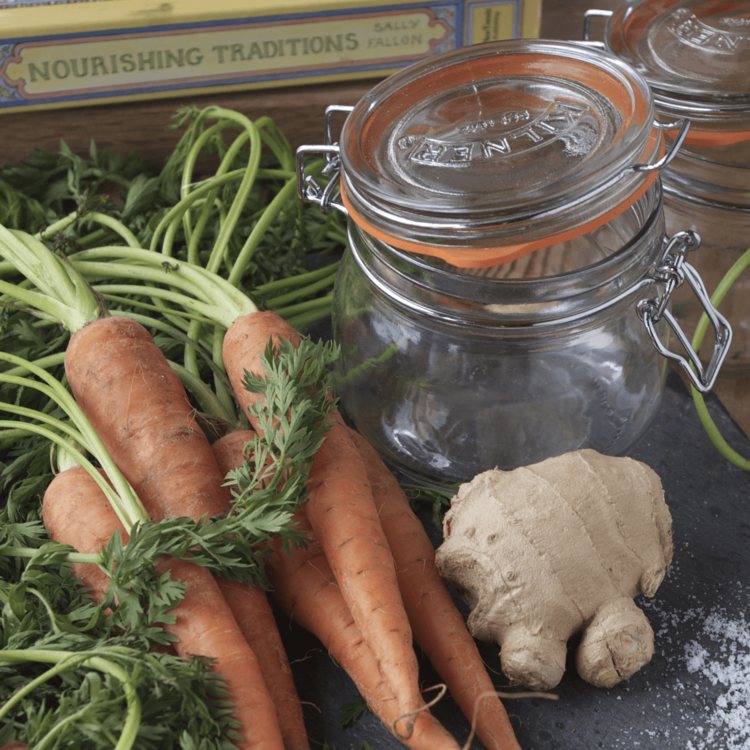
I first came across ginger carrots in Sally Fallon's "Nourishing Traditions", the inspiring book that started me on my fermenting adventures. In my version I've used the now widely available Himalyan pink salt as it's full of minerals and slightly sweeter than sea salt. You can also add some grated fresh turmeric root to yours if you want to give your New Year regime an extra boost. I can find both fresh turmeric and Himalayan salt in my local wholefood shop.
I call these Spritely Ginger Carrots as their clean zingy taste puts a spring in my step on a grey day. As organic carrots are relatively cheap and available in most supermarkets (check out Lidl for the cheapest) do use them as they will be pesticide free. Give your carrots a wash but you don't need to peel them.
Recipe
You will need one 500g size Kilner type jar that has been washed clean in hot soapy water and dried and a stopper to keep the carrots under the juice - see below.
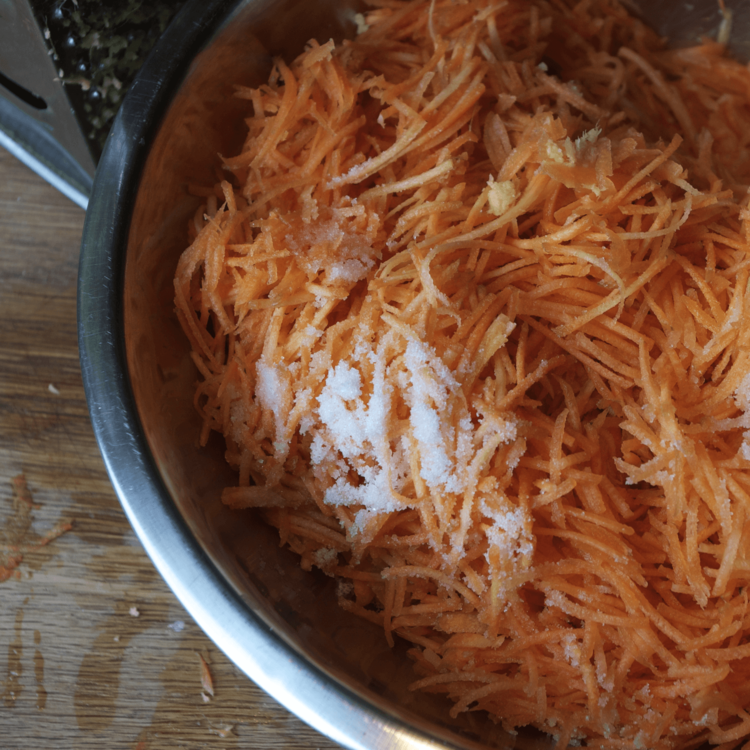
- 450g finely grated organic carrots
- 2 teaspoons of Himalayan pink salt
- 4cm cube of fresh ginger, peeled and grated
- Optional root of turmeric finely grated
Instructions
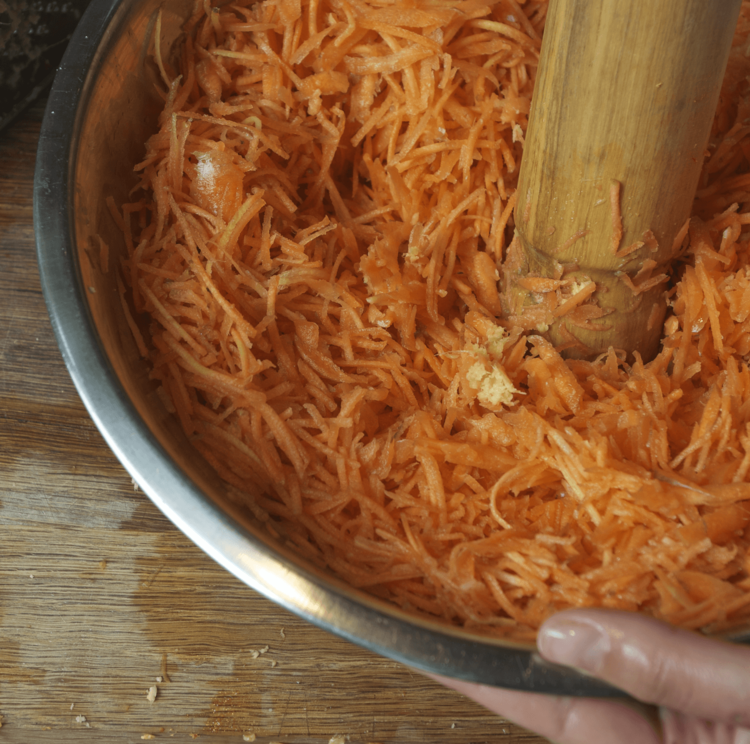
Put all the ingredients in bowl and mix well. The key to fermenting is to squeeze or pound all the carrots to release their juices. I use my hands and squeeze hard - if you are going to pound with, say the end of a rolling pin, make sure you are not using a glass bowl. Surprisingly quickly you will see that the carrot juices are running through your fingers as your squeezing or pounding breaks down the carrot cell walls. Carry on squeezing until you have plenty of lovely carrot juice.
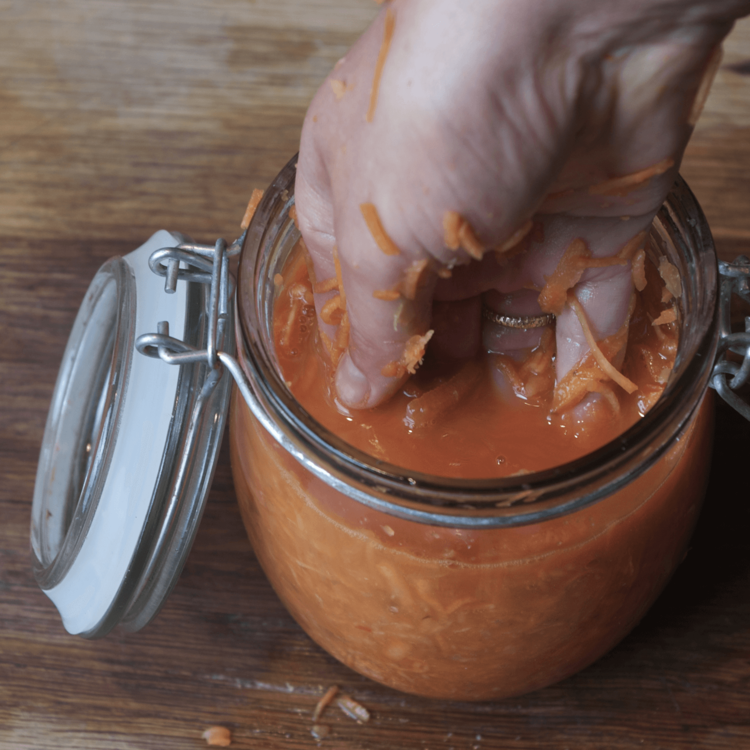
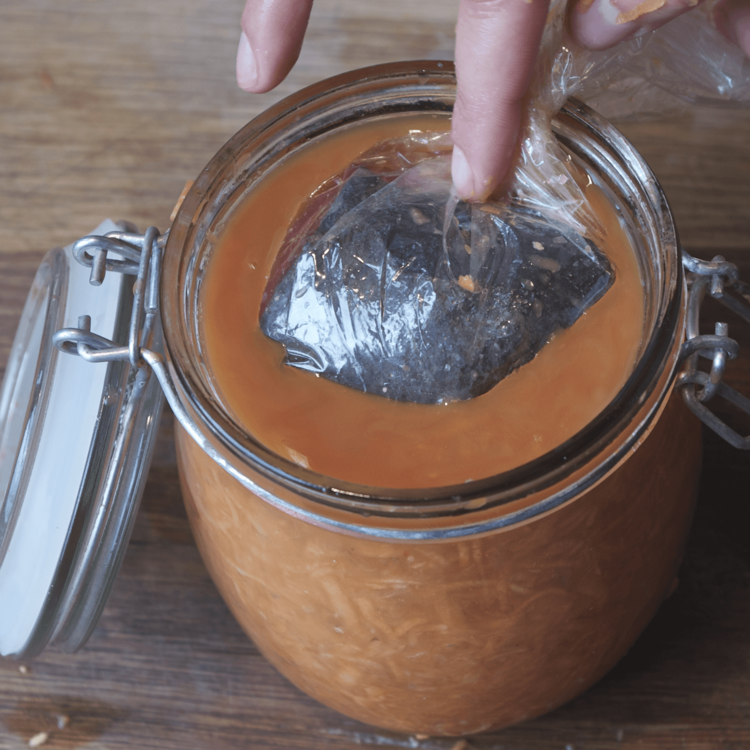
Now, it's important to pack your carrot tightly into your jar so there are no air pockets. I use my knuckles for this if I can get my hand in the jar, and press down each handful before adding another to the jar. You can also use the end of a rolling pin. Pour all the juices into the jar so they cover the carrots. Leave a good inch (2.5cm) gap at the top of the jar. Take whatever stopper you have (read below about stoppers) press this down on the carrots to keep them under the juice and clip the jar shut.
Choosing your jar and watching your ferment
You'll need a Kilner type jar with a clip top that will allow the gases produced by the carrots as they ferment to escape the jar easily. You will need to keep an eye on your jar for the first four or five days, opening the lid each day to 'burp' the carrots. Open the jar carefully over the sink (you will likely have juices escaping) and press down the carrots so they remain under the juices. The escaping bubbles are harmless carbon dioxide, a bi-product from the fermentation process. By pressing down your carrots as the bubbles escape you will ensure that all your carrots stay covered in juices and there are no air pockets.
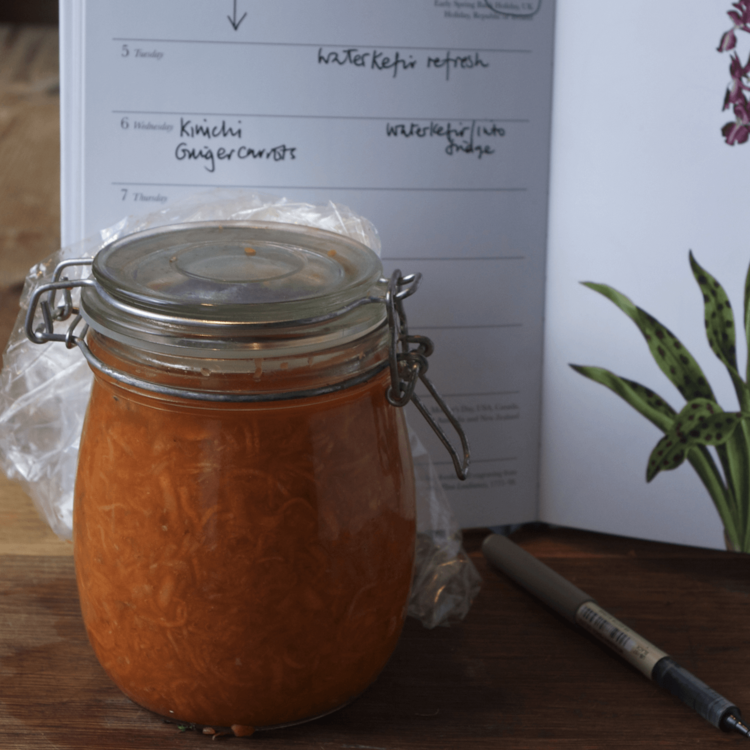
After a week or so, depending on the warmth of your kitchen, the bubbling will slow down. At this stage taste your carrots and if you like the taste start eating and keep the jar in the fridge. Keeping any fermented veg in the fridge will slow down or stop any further fermentation and hold your ferment at just the taste you like. Or you can leave your jar out in the kitchen to develop a deeper, sourer flavour. Just make sure that the juice still covers all the carrots. Keep your jar out of direct sunlight. I find the best place to start jars of ferments in my kitchen is on top of the fridge as there is a small amount of constant heat coming out of the back. Any warm place will do.
Place your jar on a saucer to catch the excess juices that will seep out. The gentle hiss of bubbling ferment gasses escaping from the jar tells you all is well and reminds you to do your daily 'burp'.
A word about stoppers
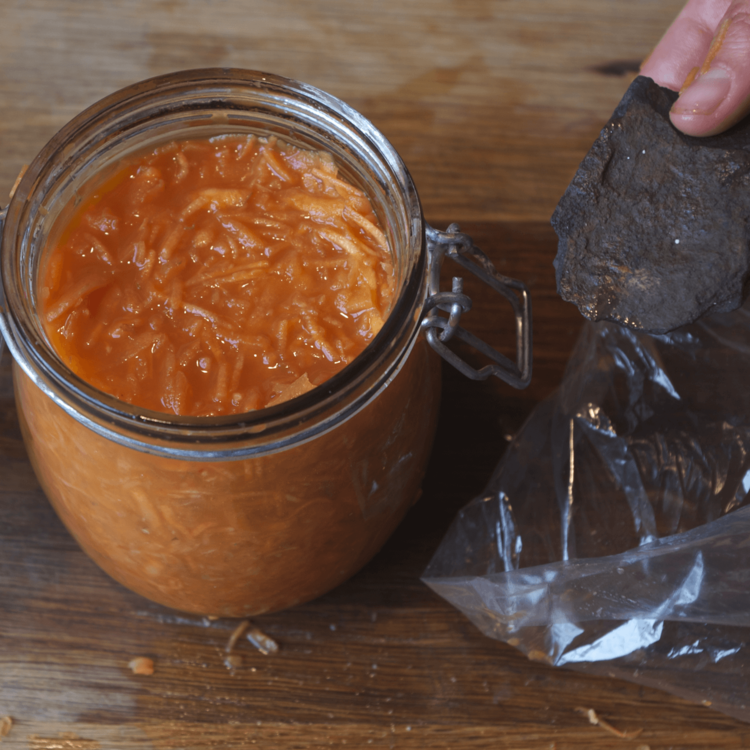
You will need a stopper for your Kilner jar to keep the carrots under the juices and fermenting happily - a process that happens without air - it's anearobic. With the different ferments I make I use different stoppers. I have a couple of lovely glass discs which do the job perfectly but I also use pieces of organic veg too, like a chunk of cucumber or a folded cabbage leaf. You can use a flat stone in a plastic bag to do the job too, as I did here. Whatever you choose don't miss the stopper out as it is essential to a successful ferment.
Label your jar lid with the date (if you put the label on the side of the jar the escaping juices will likely wash your writing off) or put a note in your diary. Its good to get to know how many days it takes to make your ferments taste just how you like them.